

DIY Custom Shower Installation Guide: Step-by-Step
Table of Contents
DIY Custom Shower Installation Guide: What You're Getting Into
Tools and Materials for Custom Shower Pan Installation
Substrate Prep, Permits, and Your Installation Blueprint
Do You Need a Permit for a Custom Shower?
Custom Shower Waterproofing Techniques That Prevent Leaks
Substrate Prep Comes First
Liquid vs. Sheet Membrane: Pick One and Commit
The Three Moves That Actually Stop Leaks
Flood Test Before You Tile
Building the Shower Pan and Drainage Slope
Dry Fitting, Leveling, and Tile Installation
Shower Door Assembly and Glass Integrity Checks
How Long Does a Custom Shower Remodel Take?
DIY vs. Pro: Cost, Maintenance, and Longevity
Frequently Asked Questions
Last Updated: October 2, 2026
DIY Custom Shower Installation Guide: What You're Getting Into
A DIY custom shower installation guide is a step-by-step plan for building a tiled walk-in shower yourself, from framing and waterproofing to tile and glass doors. It sounds simple on paper. In practice, it is one of the least forgiving projects a homeowner can take on.
Here is the part most guides skip: a shower fails from the inside out. Water gets behind the tile, sits against the framing, and rots the structure for months before you ever see a stain.
At TRC Home Improvement, we have spent over 30 years building and repairing showers in this region, and we have seen the same mistakes repeat.
Watch Out The most common DIY failure is skipping the waterproofing membrane behind the tile. Water reaches the framing within weeks. Rot and mold follow, and the repair bill often runs higher than the original build.
Tools and Materials for Custom Shower Pan Installation
You cannot dry fit, slope, or level anything without the right kit staged on site. Two trips to the store mid-project is how a weekend job turns into a month.
Safety gear
Knee pads, safety glasses, N95 dust mask, nitrile gloves
GFCI-protected extension cord for wet-area tools
Cutting and shaping
Wet saw with a continuous-rim diamond blade for porcelain and ceramic
Angle grinder with a diamond cup wheel for backer board and mortar cleanup
Tile nippers for curved cuts around the drain and valve
Carbide-tipped hole saw for the shower valve and drain penetrations
Layout and leveling
4-foot and 2-foot levels, plus a 6-foot straightedge for checking pan slope
Tape measure, chalk line, framing square, laser level if you have one
Tile spacers (1/8-inch or 3/16-inch, matched to your grout line)
Mixing and setting
1/2-inch drill with a paddle mixer for thin-set and mortar
Two 5-gallon buckets (one for mixing, one for rinse water)
Margin trowel, notched trowel (1/4-inch square notch for walls, 1/2-inch for large-format floor tile)
Grout float, rubber mallet, sponge, and a grout bag for vertical joints
Plumbing
Pipe wrench, adjustable pliers, thread seal tape, copper or PEX cutters
Drain wrench sized to your clamping ring
Materials, matched to your pan method
The single biggest material decision is whether you build a traditional mortar-bed pan or use a bonded waterproofing system. They require different substrates and different membranes, and mixing the two is a common failure point.
Cement backer board: 1/2-inch for walls, 1/4-inch for floors over a solid subfloor. Common brands include USG Durock, James Hardie HardieBacker, and Georgia-Pacific DensShield (a coated board with a built-in moisture barrier).
Waterproofing membrane: Either a liquid-applied membrane (Laticrete Hydro Ban, Custom Building Products RedGard, MAPEI Mapelastic HPG) or a sheet membrane (Schluter Kerdi, USG Durock waterproofing membrane). Liquid membranes need two coats at the manufacturer's specified thickness; sheet membranes need unmodified thin-set and a 2-inch overlap at every seam.
Pan system: A pre-sloped foam pan (Schluter Kerdi-Tray, Wedi Fundo) is faster and lighter than a mortar bed but must match your drain location exactly. A traditional mortar bed gives you flexibility on drain placement but requires a pre-slope, a PVC or CPE liner, and a final mud bed.
Drain assembly: A clamping-ring drain for traditional pans, or a bonded-flange drain for sheet-membrane systems. Match the drain to the membrane system, a clamping drain under a sheet membrane will leak.
Sealant and caulk: 100% silicone for wet-area changes of plane; siliconized acrylic only where paint or trim meets tile.
Thin-set: Modified thin-set over cement backer board; unmodified thin-set under sheet membranes (modified can void the membrane warranty).
Fasteners: Alkali-resistant screws for backer board, hot-dipped galvanized or stainless for anything in the wet zone.
Pro Tip Buy roughly 10% more tile than your square footage. Miter cuts, drain cuts, and broken pieces during a custom fit eat through a tight order fast, and a discontinued tile is impossible to match later. Buy one extra box and keep it sealed for future repairs.
Watch Out Do not substitute modified thin-set under a sheet membrane to save a few dollars. The modified formula can react with the membrane fleece and compromise the bond, and it will void the manufacturer's warranty on the membrane itself.
Substrate Prep, Permits, and Your Installation Blueprint
Substrate prep decides whether your shower lasts five years or twenty-five. The floor must be flat, dry, and free of old adhesive. Walls need solid blocking behind every future grab bar and door hinge.
Joseph K
Draft an installation blueprint before you cut anything. Mark the drain center, the slope direction, the tile layout, and the location of the shower ledge and corner shelves.
Do You Need a Permit for a Custom Shower?
Often, yes. A permit is typically required when you move the drain, alter the plumbing rough-in, or change the framing. Cosmetic tile replacement alone usually does not need one.
Rules vary by county and city, so check with your local building department before demo day. Local building permit requirements and International Residential Code overview both outline how wet-area work is classified. Skipping a required permit can stall a future home sale.
Custom Shower Waterproofing Techniques That Prevent Leaks
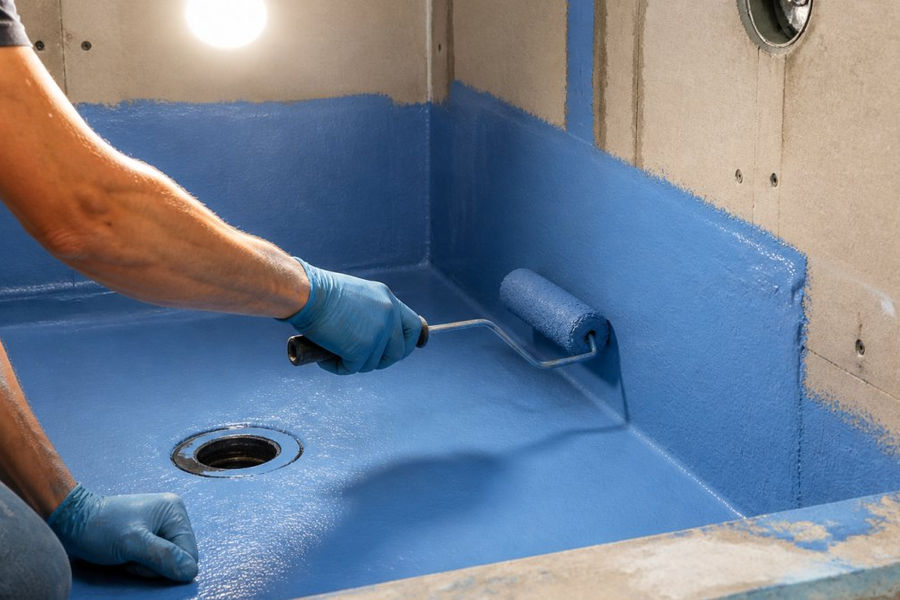
Waterproofing is the layer that actually keeps water out. Tile and grout are decorative. The membrane does the work, and it only works if the substrate under it is right.
Substrate Prep Comes First
A membrane bonds to whatever is under it. If that surface is dusty, oily, or uneven, the membrane peels and water finds the gap.
Walls: Cement backer board screwed to studs at 16 inches on center with alkali-resistant screws every 8 inches on the edges and every 12 inches in the field. Tape and mud the seams with thin-set and alkali-resistant mesh tape before any membrane goes on. DensShield and other coated boards have their own seam treatment, follow the manufacturer's spec, not a generic YouTube method.
Floors: The subfloor must be solid, flat within 1/4 inch over 10 feet, and free of old adhesive, paint, or curing compound. A plywood subfloor needs a minimum 5/8-inch thickness for a mortar bed; a concrete slab needs a flat, clean surface with no efflorescence.
Blocking: Install 2x6 or 2x8 blocking between studs at every future grab bar, bench, and door hinge location. You cannot add blocking after the membrane is sealed.
Wet-area drywall is not backer board. Greenboard and paper-faced drywall are not approved substrates under a tile shower membrane in most current codes. Use cement or fiber-cement board.
Liquid vs. Sheet Membrane: Pick One and Commit
Custom shower waterproofing techniques come down to two systems, and mixing them is the most common DIY error.
Liquid-applied membranes (Laticrete Hydro Ban, RedGard, MAPEI Mapelastic HPG) roll or brush on like thick paint.
Sheet membranes (Schluter Kerdi, USG Durock membrane) are fleece-backed rolls set into unmodified thin-set. Overlap every seam by a minimum of 2 inches, and use the manufacturer's pre-formed corners and pipe seals rather than folding the sheet.
The Three Moves That Actually Stop Leaks
Coat or cover every square inch of wet-area substrate. No gaps at the valve, no gaps behind the showerhead arm, no gaps at the curb.
Seal every seam, corner, and fastener. Membrane tape and sealant at every change of plane, every screw head that penetrates the membrane, and every pipe penetration.
Tie the wall membrane into the pan. The wall membrane must lap over the pan liner or bonded flange so water has one continuous path to the drain, never a gap where the two systems meet.
Most leaks start at a corner, a curb, or a penetration, not the middle of a wall. Treat each one like it will be tested, because it will.
Flood Test Before You Tile
This is the step most DIY guides skip and the one that saves the most money. Once the pan membrane is installed and cured, plug the drain, fill the pan with water to within 1 inch of the curb top, and mark the water line. Let it sit for 24 hours. If the level drops more than 1/8 inch, you have a leak, find it now, not after $2,000 of tile is set.
Key Takeaway A correctly sloped pan and a flood-tested membrane are the two biggest predictors of a leak-free shower. Get both right before you touch a single tile.
Building the Shower Pan and Drainage Slope
The pan must slope toward the drain at roughly a quarter inch per foot. Any flatter and water pools. Any steeper and the tile feels unstable underfoot.
Build the pre-slope first (a mortar bed that slopes to the drain), then the waterproofing layer, then the final mortar bed. The drain sits at the lowest point, and the moisture barrier laps over the pan liner so nothing wicks upward.
Watch Out A flood test is not optional. A failed pan that is not caught before tile goes down means a full tear-out, and the repair bill often runs higher than the original build.
Dry Fitting, Leveling, and Tile Installation
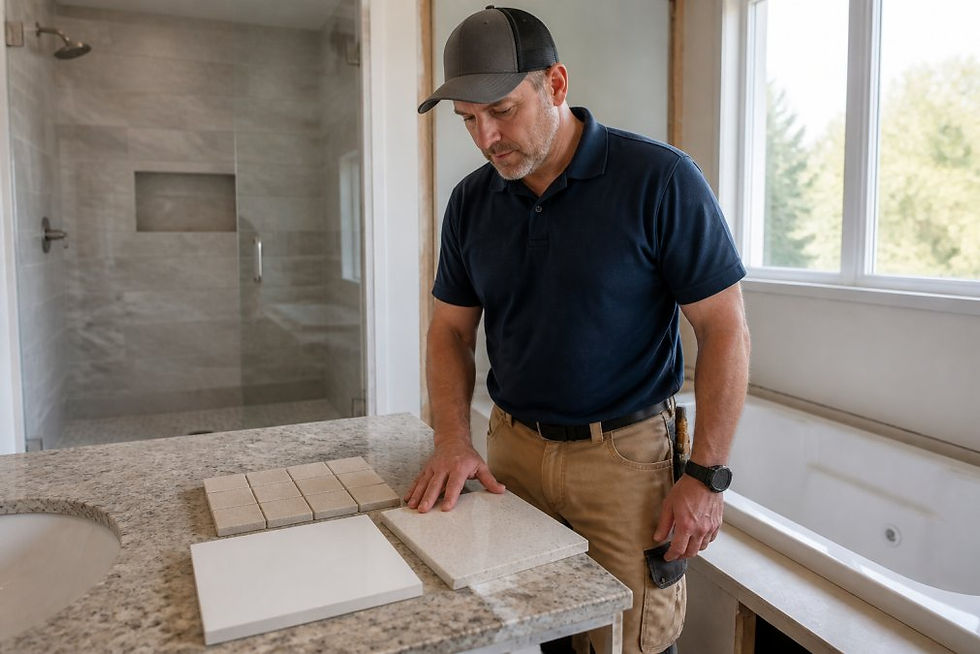
Dry fit every tile before you set it. Lay the full pattern on the floor, check your miter cuts, and confirm the layout is centered.
Level as you go. Check with a 4-foot level across the walls and floor after every few rows.
Then set the tile in thin-set or tile adhesive, press it firmly, and keep spacer lines consistent.
Tile installation standards explains why movement joints at corners should be caulked, not grouted.
Shower Door Assembly and Glass Integrity Checks
Shower door assembly starts with a level threshold. If the curb is off, the glass will bind and the seals will fail.
Follow the manufacturer's sequence: track or hinges first, then panels, then the door. Check glass integrity before you tighten anything. Look for chips at the edges and shipping damage inspection marks on the frame.
Confirm the enclosure is square before hanging glass
Use the supplied fasteners, not hardware-store substitutes
Leave a small gap at the bottom for water flow and air
Watch Out Never drill into tempered glass to fix an alignment problem. It shatters instantly. Adjust the frame instead.
How Long Does a Custom Shower Remodel Take?
A custom shower remodel usually takes two to four weeks from demo to final caulk. A simple tub-to-shower conversion with a prefab pan can finish in under a week. A fully tiled custom shower with a bench, niche, and glass enclosure runs longer.
The timeline depends on:
Demo and inspection: 1-2 days, longer if hidden rot appears
Framing and plumbing: 2-4 days
Waterproofing: 2-3 days, including cure time
Tile and grout: 3-6 days
Glass and fixtures: 1-2 days
Drying and cure times are not optional. Rushing them is how showers leak.
DIY vs. Pro: Cost, Maintenance, and Longevity
DIY saves on labor but adds risk. One waterproofing mistake can cost more to fix than hiring a pro would have cost upfront.
Factor | DIY | Professional Install |
Upfront cost | Materials only | Labor plus materials |
Timeline | Weeks to months | 2-4 weeks typical |
Waterproofing risk | High if untested | Managed by experienced crew |
Warranty | None | Backed by the installer |
Resale value | Varies | Documented, licensed work |
Longevity favors a properly waterproofed install, whoever builds it. Maintenance is the same either way: re-caulk changes of plane yearly, keep the drain clear, and fix chips fast.
Cost-benefit comes down to your time and tolerance for risk.
Frequently Asked Questions
What are the most common shower installation mistakes to avoid?
The biggest mistakes are skipping the waterproofing membrane, setting the drain without a proper slope, and not checking for shipping damage before installation. A shower floor needs a slope of at least 1/4 inch per foot toward the drain for water flow. Missing this causes standing water and eventual leaks. Another common error is installing wall panels or tile before the plumbing rough-in is verified and pressure-tested, which forces costly rework later.
Is it realistic to install a custom shower as a DIY project?
It depends on your skill level and how much time you have. A basic tub-to-shower conversion with a pre-made pan and acrylic walls is manageable for a confident DIYer. A fully custom tiled shower with a mud-set pan, waterproofing membrane, and frameless glass enclosure requires experience with tile adhesive, miter cuts, and leveling. If you have never worked with cement backer board or a moisture barrier, hiring a licensed professional protects your investment.
Do custom shower enclosures need to extend to the ceiling?
No, shower enclosures do not have to reach the ceiling. Many custom showers stop at 72 to 78 inches, leaving a gap for ventilation. Extending to the ceiling can trap steam and moisture, which encourages mold growth unless you have an exhaust fan rated for the room size. The decision comes down to your bathroom's ventilation and whether you want a steam-shower setup. For standard showers, a gap above the glass is fine and easier to install.
How do you ensure proper drainage slope in a custom shower floor?
Set your drain so the finished floor slopes 1/4 inch per foot from the perimeter to the drain. Use a level to mark a consistent height around the shower ledge, then build your mud bed or foam pan to that line. Check the slope with a level after the mortar sets but before tiling. A correct slope moves water to the drain and prevents pooling, which protects your waterproofing membrane and grout from premature failure.
A leaking shower is not a cosmetic problem. It is a structural one, and it rarely shows up until the damage is done. TRC Home Improvement has handled custom tiled walk-in showers and tub-to-shower conversions for over 30 years, with advanced waterproofing techniques, no-pressure design consultations, and a free estimate. We are fully licensed in NC and SC. Get started with TRC Home Improvement and build a shower that stays dry for decades.
Contact Us


Comments