

How do you plan a custom tile shower layout?
Plan a custom tile shower by measuring the bathroom, deciding how you will enter and use the shower, and coordinating the drain, waterproofing, fixtures, and tile pattern before construction. The layout must account for finished wall thickness, door movement, storage, and access—not just the space left after removing the old tub. For a 2026 remodel, settle those construction decisions with your contractor before choosing decorative details.
TL;DR
Plan a custom tile shower around entry space, drainage, waterproofing, and daily use before selecting tile.
TRC Home Improvement Services suits Charlotte-area homeowners seeking custom tiled showers and pressure-free design consultations.
Choose a curbed or curbless shower only after your contractor checks the existing floor and drainage requirements.
Confirm the shower layout, storage, fixtures, and tile placement together before construction begins.
How do you plan a custom tile shower layout?
Start with a measured plan that shows both the shower and the bathroom around it. A shower that looks spacious on paper can still interfere with a vanity drawer, crowd the toilet, or leave nowhere convenient to hang a towel.
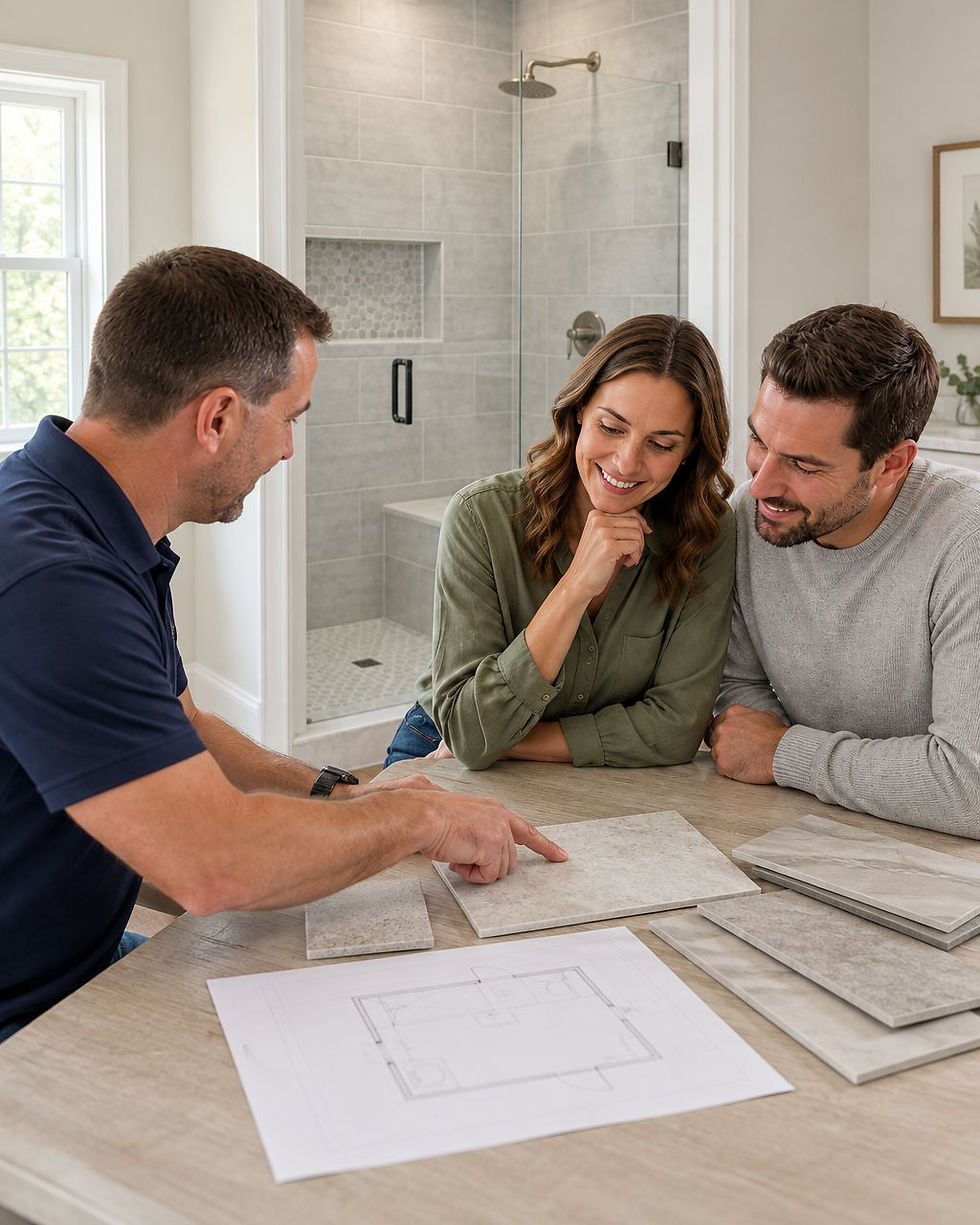
TRC Home Improvement Services provides custom tiled showers, tub-to-shower conversions, and bathroom remodeling for homeowners in the greater Charlotte and Fort Mill/Rock Hill area. Bring your room measurements and priorities to a pressure-free design consultation so the conversation starts with how you need the bathroom to work.
1. Measure the whole bathroom
Record the existing shower or tub footprint, ceiling height, doorway, window locations, toilet position, and vanity. Include door swings and the space needed to stand at the sink or step out of the shower.
Distinguish between measurements taken over existing finishes and the proposed finished dimensions. Removing old materials and installing new wall assemblies changes the usable space. Ask your contractor to confirm finished dimensions rather than treating the old tub opening as the final shower size.
2. Plan the entry
Decide where you will approach the shower, step inside, and reach for the controls. Think about the route you take while carrying a towel and where water will land when you open the enclosure.
Mark the proposed glass and door movement on the plan. An entry should work with the vanity, toilet, bathroom door, and your movement—not require you to squeeze around them.
3. Coordinate drainage
Have your contractor assess the existing drain location and the floor beneath it. A different drain position or a lower shower entry affects more than the visible tile.
The shower floor needs a planned slope toward the drain. Confirm how the drain connects to the waterproofing assembly and how the finished entry contains water before approving the layout.
4. Position fixtures
Place controls where you can reach them comfortably, ideally without standing directly under the initial spray. Coordinate the showerhead with the entry and enclosure so the spray is directed into the shower.
Plan niches, seating, and any future grab-bar support at the same time. These features affect the wall construction and should not become last-minute additions after tile installation starts.
5. Set tile lines
Review the tile pattern against the actual wall dimensions, niche openings, corners, and drain. Ask where cut tiles will appear and which wall will be the main view from the bathroom doorway.
A layout drawing helps you see whether grout lines meet neatly and whether an accent creates awkward cuts. Approve the arrangement before installation, not after the first wall is finished.
Resolve the construction layout before finalizing the decorative tile pattern.
Why this matters
A tiled shower combines a visible finish with a water-management system behind it. Attractive tile cannot compensate for an entry that releases water into the room or a waterproofing detail that was never resolved.
For your 2026 bathroom project, separate decisions into two groups: features you can change through finish selections and features that require construction changes. Tile color belongs in the first group; moving a drain, changing the entry, or adding recessed storage belongs in the second.
Good planning protects both daily comfort and the work hidden behind the tile. It also gives you a clearer scope to discuss with a contractor before you approve the project.
Which shower entry fits your bathroom?
A curbed entry has a raised threshold. A curbless entry removes that raised barrier, but it still needs a deliberate approach to floor height, slope, drainage, and water containment.
Neither option is automatically right for every bathroom. Use the comparison below to frame the design discussion rather than choosing from appearance alone.
Entry option | Best for | Main advantage | Main limitation |
Curbed shower | Homeowners comfortable stepping over a threshold | The raised edge helps separate the shower from the bathroom floor | The threshold creates a step to cross |
Curbless shower | Homeowners prioritizing entry without a raised threshold | Removes the curb from the entry path | Requires careful coordination of floor construction, drainage, and surrounding waterproofing |
Curbed shower: a defined entry
A curbed shower provides a clear boundary between wet and dry areas. It is worth considering when you are comfortable with a step and want a defined enclosure.
The curb still needs proper waterproofing and a finished surface that directs water inward. Ask how the glass will attach and how the installer will protect the waterproofing at attachment points.
Curbless shower: an entry without a raised threshold
A curbless shower removes the curb, but that alone does not make the entire bathroom accessible. Entry width, maneuvering space, controls, seating, and support needs still matter.
Ask your contractor to assess feasibility before making curbless entry a fixed requirement. The existing floor construction and its relationship to the bathroom floor must support the proposed design.
How should you arrange the shower interior?
Start with your daily routine. Where do you stand, which hand reaches for the controls, and where do you keep shampoo within reach?
Explain any difficulty stepping, bending, or reaching during the consultation. Your contractor needs those priorities before deciding where fixtures, storage, and support belong.
Keep controls easy to reach
Position the controls so you can turn on the water without an awkward stretch. Check that the enclosure or door will not block access.
A handheld shower also needs a practical mounting position and hose path. Show the proposed location on the plan rather than leaving it to an installation-day decision.
Give storage a deliberate place
A recessed niche needs space within the wall and waterproofing around its opening. Existing plumbing, framing, or an exterior wall can affect where it belongs.
Check the containers you actually use before approving the opening. A niche that looks balanced in a drawing is not useful if your everyday bottles do not fit.
Plan seating and support together
If you want a seat, consider both the seated position and the standing space it leaves. Make sure you can reach the controls and storage from the intended position.
Discuss grab-bar locations and the supporting material inside the wall before it closes. A towel bar is not a substitute for a properly installed grab bar.
How do you choose tile without compromising the layout?
Select tile for its intended location, not just its appearance. Shower walls and shower floors have different demands, so ask your contractor to confirm that each selection is suitable for its use.
For a 2026 custom tile shower, review a sample layout showing corners, edges, the niche, and the drain. That drawing connects the tile you like to the shower you will actually get.
Floor suitability: Confirm that the selected tile is intended for shower-floor use and review its wet-use guidance.
Drain relationship: Ask how the tile will follow the planned slope and meet the drain.
Cut placement: Identify narrow cuts at corners, openings, and visible edges before installation.
Edge finishing: Decide how exposed tile edges will be finished around the entry and niche.
Maintenance: Discuss cleaning requirements for the tile, grout, and enclosure before committing to the materials.
Smaller tiles can follow changes in floor slope more readily, while larger tiles require a layout suited to the drainage design. Neither choice replaces proper slope or waterproofing. Let the floor construction guide the selection rather than forcing a decorative preference onto an incompatible layout.
Why custom tile shower layouts vary
The right layout depends on the room and the person using it. These factors also shape the project scope and the individual quote:
Existing footprint: The tub or shower opening, toilet, vanity, and doorway establish the starting constraints.
Plumbing location: Moving the drain or supply lines changes the work behind the finished surfaces.
Floor construction: The structure beneath the bathroom affects how the shower base and entry can be built.
Water containment: The showerhead position, enclosure, threshold, and slope must work together.
Built-in features: Niches, benches, and support locations require coordinated construction details.
Finish complexity: Tile patterns, edge treatments, and enclosure details affect installation work.
When you compare proposals in 2026, compare these decisions—not just the phrase “tile shower.” Ask each contractor to describe what is included, what remains undecided, and how discoveries after demolition will be handled.
TRC Home Improvement Services brings 30 years of hands-on experience to bathroom remodeling and custom tiled showers. Its pressure-free design consultations suit homeowners who want help coordinating the construction and finish decisions; your existing bathroom still needs an individual assessment before the layout and quote are settled.
What should you bring to a shower design consultation?
Bring wide photographs of the bathroom, close-ups of existing problem areas, and a simple sketch with approximate measurements. Include the bathroom doorway and surrounding fixtures, not only the shower opening.
Make a short list of what frustrates you now. A cramped entry, unreachable controls, or cluttered storage gives the design conversation a more useful starting point than a collection of attractive tile photos alone.
Use this consultation checklist:
Identify the features you need and the details you can compromise on.
Explain whether you want to keep the footprint or consider a larger bathroom remodel.
Ask which dimensions need on-site confirmation.
Request an explanation of the waterproofing and drain approach.
Confirm who will coordinate tile, plumbing, enclosure, and finishing decisions.
Ask for an individual quote tied to a clearly described scope.
For homeowners in Charlotte, Ballantyne, Pineville, Waxhaw, Indian Trail, and Mint Hill, the next useful step is a conversation about the actual bathroom—not a promise based only on a photograph.
Discuss your shower layout
Ask TRC Home Improvement Services about a pressure-free design consultation and an individual project quote.
Can you keep the existing tub footprint for a tiled shower?
You can plan around the existing tub footprint, but your contractor must verify the finished space, drain arrangement, and entry. Removing the tub does not automatically establish a suitable shower base.
For a tub-to-shower conversion, confirm where you will stand, enter, and reach the controls. Keeping the general footprint does not remove the need to plan waterproofing and water containment.
Should you choose the tile before meeting a contractor?
Choose inspiration before the consultation, but leave final tile approval until the layout and floor design are checked. A preferred material or format needs to work with the drain, slope, and edge details.
Bring samples or photographs to explain your taste. Treat them as design direction rather than a finished construction specification.
FAQ
What's the first step in planning a custom tile shower?
The first step is measuring the whole bathroom and documenting how you want to enter and use the shower. Include the vanity, toilet, doorway, and existing plumbing so the layout accounts for the surrounding room.
Is a curbless shower better than a curbed shower?
A curbless shower is better for removing a raised entry barrier, while a curbed shower provides a defined threshold. The right choice depends on your needs and whether the existing floor supports the proposed construction.
Where should shower controls go?
Shower controls should be easy to reach without an awkward stretch or obstruction from the enclosure. Coordinate their position with the showerhead, entry, and any seating before the walls are finished.
Can I put a shower niche on any wall?
A shower niche location must work with the wall's framing, plumbing, and waterproofing details. Ask your contractor to confirm the proposed position before you approve the tile layout.
Does shower tile make the walls waterproof?
Tile and grout alone do not replace a waterproofing system. A tiled shower needs a coordinated waterproofing assembly connected to the drain and detailed around corners, openings, and fixtures.
How do I get a quote for a custom tile shower in 2026?
Get an individual quote based on your bathroom, proposed layout, and finish selections. TRC Home Improvement Services offers pressure-free design consultations for homeowners considering custom tiled showers and bathroom remodeling.
One last thing
Before approving the layout, stand in the bathroom and rehearse using it. Reach for the proposed controls, imagine the enclosure opening, and point to where your towel and shampoo will go.
Approve the shower you can comfortably use, not just the tile arrangement you like. That simple check gives you specific questions to resolve before construction begins.


Comments